
by Flagship Staff | Mar 13, 2017 | Blog
Homeowners looking to get the best price for their home are learning that if you want to sell quickly and score big profits, you need to remove clutter and make the place look inviting, not lived in.
Staging your house can help you sell it faster and possibly bring you more money, say many real estate professionals. The cost to stage a home is typically less than 1 percent of the list price and the return is typically 1 to 5 percent over the list price.
Homeowners can hire a staging company, work with a real estate agency that does the staging for its clients or do it themselves. Here are 11 tips for staging your home that will have a positive impact on its price and appeal:
1. Give your home curb appeal
Most buyers start their home search on the Internet. Often their first impression of your home is a photo of the outside. Before you take that photo, be sure you have spruced up the grounds of the house by weeding, mulching, trimming back trees and bushes, and power washing your siding and walkways.
2. Depersonalize and declutter
When buyers come into your house, it’s important they be able to visualize themselves living there. So take down anything personal, including family photos, collections, diplomas or awards, replace them with generic artwork and photos.
3. Clean your house
Make your house shine by cleaning everything including the inside of your appliances, the baseboards and windows. Change your air filters and clean out your gutters. This will show buyers that you do regular maintenance on the house.
4. Get rid of odors
If you’re a smoker or have a pet, it’s important to get rid of odors. Be careful of using air fresheners, because many are too strong and they might suggest you are trying to hide something. Open the windows instead.
5. Neutralize colors
Potential homebuyers might not love the dark purple accent wall in the dining room as much as you do, so it’s best to paint the walls a neutral color before you start showing the house. You don’t have to paint every wall white but it should be a neutral color that will appeal to a variety of people.
6. Turn up the lights
At every open house open every blind and curtain to let in as much light as possible. If a room seems too dark or the lamp is outdated, update the lighting fixture or buy new lamp. Make sure all the light bulbs in your house are working on the day of the open house.
7. Pare down furnishings
Oversized furniture can make a room feel smaller. Furniture is there to help the buyer visualize what the room is used for, but it’s best to minimize the number of pieces so the buyer can envision their own furniture in the room.
8. Accessorize
After you remove all the clutter add some accents such as interesting coffee table books, throw pillows and blankets on the sofa, a bowl of fresh fruit on the kitchen counter and matching towels in the bathroom.
9. Make repairs
If there is anything that clearly needs to be repaired or if there are any unfinished projects, you need to take care of them before the open house. No potential buyer wants to see unfinished work inside the house.
10. Clean out the closets and drawers
Potential buyers will open every closet, cabinet, drawer and door. You will want to display as much storage as possible. Use baskets to hold items that are normally just loose in drawers and in closets to make them look less cluttered. Professionals suggest removing 20 to 30 percent of what is inside each closet to show space between items that are hanging up. This will make the closet seem larger.
11. Check the floors
If the carpeting is stained, replace it. If you’re using an old area rug, remove it. If your wooden floors are scratched, cover them with inexpensive area rugs.
Staging a home is key to appealing to prospective buyers.
by Flagship Staff | Mar 6, 2017 | Blog
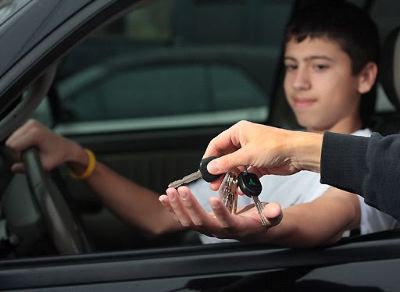
As a parent, you can expect your car insurance premiums to increase once your teen driver gets behind the wheel. In fact, adding a teenage driver to your policy can nearly double your premiums. Aside from encouraging your teenage child to take defensive driver lessons, follow these money-saving tips to cut down the cost of car insurance for teenagers.
1. Take advantage of multi-policy discounts
Getting your auto, home and life insurance from one company will not only save you time by having all your bills in one place, you can also save up to 25% on your policy by bundling your insurance policies.
2. Opt for higher deductibles
Having higher comprehensive and collision deductibles may increase your out-of-pocket expenses, but they can also save you hundreds of dollars by drastically reducing your overall premium. Taking advantage of Nationwide’s “Vanishing Deductible” option could help offset your higher deductible in the event of a claim.
3. Reward your child for good grades
If your teen driver is a full-time student with a B average or higher, they may be eligible for a good student discount. If the student is homeschooled, however, they must score in the top 20% of a standardized test such as the SAT.
4. Buy a safe and reliable car
High-end car models are more costly to insure, so opt for a more a practical vehicle equipped with safety features, such as anti-lock brake system (ABS), anti-theft devices and rearview cameras.
5. Get a pre-owned car
Car insurance rates for used cars are usually cheaper than new models, so forget that brand new SUV and drive away with a slightly older vehicle instead.
For a teenager, getting a driver’s license is a step towards independence, but it comes at the cost of higher insurance rates. By following the tips above and practicing safe driving habits, you can lower the cost of car insurance for your teenager.
Insurance terms, definitions and explanations are intended for informational purposes only and do not in any way replace or modify the definitions and information contained in individual insurance contracts, policies or declaration pages, which are controlling. Such terms and availability may vary by state and exclusions may apply. Discounts may not be applied to all policy coverages.
by Flagship Staff | Feb 27, 2017 | Blog
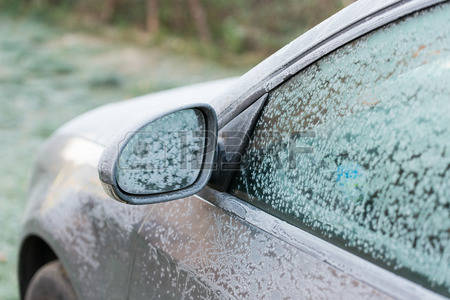
In the Midwest, coming out to a car covered in snow and ice is a common occurrence.
If you’re used to having your car buried in snow or covered with ice, here are some tips that can help you and your car survive the winter months.
1. Stand up your wipers. Lately, I’ve noticed more people doing this. If a winter storm is scheduled to start after you get to work, raise your windshield wipers off the glass. This will prevent them from being frozen to the windshield. Snow removal is much easier too. To take it a step further, you could cover your wipers with an old pair of socks or plastic grocery bags. Keeping snow and ice off your windshield wipers is important for a safe drive home.
2. Hand sanitizer. If you have an older car or a broken key fob, your door lock could freeze. If you have hand sanitizer with you, it’s your lucky day! Rub a small amount of hand sanitizer on the lock to melt the ice.
3. Frozen doors no more. Have you ever struggled to get a frozen car door open? If so, this could be a thing of the past. Cooking spray, which is a staple in most homes, can solve this problem. Gently apply cooking spray on the rubber around the door and the car frame to prevent freezing. Gently wipe off excess spray on the rubber with a paper towel or rag.
4. Scrapping side mirrors is a pain. If you don’t have heated side mirrors, scraping them can be difficult. As soon as you start scraping, the mirror moves. To prevent frosty side mirrors, cover them with a plastic bag. Make sure the bags are securely fastened with rubber bands.
5. Foggy windows are a pet peeve. Foggy, dirty windows drive us crazy in the winter. To help alleviate fog buildup on your windows, there are a number of tricks that can help.
Apply shaving cream and immediately wipe it off.
Buy Rain-X® Interior Glass Anti-Fog.
Fill an old sock with kitty litter and store it in your car. This trick will remove moisture from the air.
6. Apply Rain-X 2-in-1 glass cleaner with rain repellent. This cleaner works great! Not only does it clean your dirty salty windshield, it applies water beading technology. If your wipers make that awful noise in light rain or melting snow, Rain-X can help reduce the number of wipes and increase visibility.
7. Impenetrable windows. I’m sure you’ve experienced the impenetrable sheet of ice on your car. No matter how hard you try to scrape your windows, success is limited. To defeat the ice that prevents you from going where you need to go, simply mix a solution of 2/3 vinegar and 1/3 water. Put it in a spray bottle and spray it on the ice. It works like charm in melting the ice.
8. Stuck no more. 20 or 40 pounds of kitty litter stored in your trunk can serve several purposes. First, if placed over rear wheels, it can enhance traction. Second, if you deviated from the roadway and are now stuck, pour some of it out under your tires to help get traction. Cardboard or floor mats can also help get you back on the roadway. Simply place them under your tires.
Do you have any tips or information you’d like to share? I’d love to hear them; please share them in the box below.
by Flagship Staff | Feb 20, 2017 | Blog
Let it snow, let it snow, let it snow. Now what?
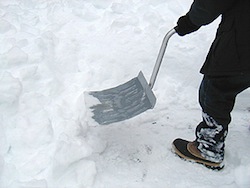
Winter is here, and that undoubtedly means we’ll get snow. While it can create a winter wonderland and provide the perfect setting for a day of sledding or snowman building, it can also turn your sidewalks and driveways into hazardous areas.
When the snow hits, be sure to keep these tips in mind so you can enjoy your snow day.
1.Check your local ordinances about snow removal. You’re likely required to remove all snow on walkways within 24 hours of snow accumulation. If you’ll be out of town, make sure you arrange for someone to come to your property and take care of the snow removal for you.
2.Get yourself a present this year. Purchasing an ergonomic snow shovel can help avoid unnecessary strain to your body. Even fluffy snow can feel heavy when you have a lot of area to clear.
3.Salt freshly-cleared areas. When shoveling or snow blowing is complete, be sure to salt the freshly-cleared areas. A light dusting and freezing temperatures can turn quickly walkways into ice rinks. Driveways should get the salt treatment, as well. If you prefer, sand can be used instead of salt.
4.Keep the mail carrier and garbage/recycling collectors in mind too. Snowplows can make mailboxes and garbage/recycling bins difficult to access which makes their jobs that much harder.
Keeping your property safe is incredibly important if you want to avoid injury to a guest, passerby, or worker. If someone slips and falls on your property, you could be facing an insurance claim. The person who fell may also sue you. This is why it’s important to understand how your insurance policy works to keep your finances protected.
While your Homeowner’s Liability and Medical Payments coverages will respond if someone falls on your property and you’re found liable, will you have enough coverage? If your Homeowner’s Liability limit is at $100,000, you might not have enough coverage for all the medical expenses incurred by the person who fell. With the rising costs of hospital care, it’s best to review your policy with your insurance agent to make sure you have enough coverage.
If you don’t already have an Umbrella Liability policy, it’s a good time to look into purchasing one. If your Homeowner’s Liability coverage limit is met, but you still owe money, your Umbrella Liability policy will kick in and provide at least $1,000,000 of additional coverage.
If the chore of snow removal is too strenuous or you simply don’t want to do it, there are many professional snow removal services around. Give them a call and let them keep your property safe.
by Flagship Staff | Feb 13, 2017 | Blog
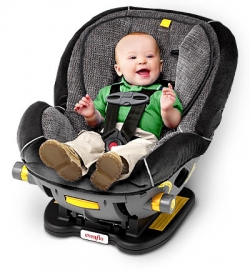
Today, safety experts recommend putting children in their car seats without their winter coats. Doesn’t this seem counter intuitive? After all, it is winter.
Recently on the “Today” show, Jeff Rossen did a segment on car seat dangers during the winter. He visited a crash test lab in Michigan. His segment shows the dramatic results of a car crash at 30 mph with a crash dummy inappropriately strapped in because of a puffy winter coat. Miriam Manary, who operates the lab, explains the proper way to strap in a child during the winter months. She recommends strapping them in without a coat. To keep them warm she suggests using a blanket or putting on their jacket backwards.
If you’re expecting your first child and haven’t picked out your car seat, check out the information at safercar.gov. Their website provides information on:
How to select the right car seat;
What safety ratings mean;
How to install your car seat; and
How to register your car seat and how to get recall notifications.
Consider ordering a TIKE (Toddler Info Kept for Emergencies) sticker to attach to your car seat. TIKE is a bright neon green sticker that includes a child’s emergency and medical contact information that goes on the car seat. This information in critical if you have an accident and you’re unable to help the first responders with the care of your child.
