
by Flagship Staff | Jun 26, 2017 | Blog
Another sign that warm weather is here is the roar of a motorcycle as it drives down your street. It’s always been my dream to own a motorcycle.
Like many things in life, a motorcycle must be respected by the rider and other motorists who share the road. Motorcycles are small, hard to see, and fast. Without proper training and a basic understanding of how they work, serious and dangerous situations can arise. Unfortunately, motorcyclists are 26 more times likely to die in a crash and five times more likely to be injured than car occupants.
Here are some tips on how you can safely share the road with motorcycle riders.
1. Don’t be a bully. If you drive a larger vehicle, like a pickup or SUV, you may feel a bit aggressive when a motorcycle is in your way. Following at a close distance in an attempt to motivate them to go faster or get out of your way isn’t wise. This creates dangerously-short breaking distances. In addition, it may cause the motorcycle rider to become stressed and pull an unsafe maneuver. Everybody has the same right to be on the road. If you end up following a motorcycle, maintain a distance between of at least four seconds.
2. Double check your blind spots. Because of their speed and size, motorcycles may quickly come in and out of your blind spots. Always take a second look now that motorcycles are out on the road.
3. Be courteous. If you’re annoyed because a driver isn’t driving at your speed or if a blinker has been blinking for miles, take a couple of deep breaths. Little mistakes happen. If we blow them out of proportion, there can be dangerous consequences.
4. Be cautious when turning left. Making a left turn can be tricky, especially when traffic volume is heavy. You may have difficulty seeing due to sun glare, or because another vehicle is making a left turn opposite of you. You also have to watch for pedestrians in the cross walk. In addition, don’t forget about a motorcyclist. Most accidents between a car and motorcycle occur in intersections. Due to a motorcycle’s small size, we just don’t see them. When making a left turn, scan the intersection to determine what’s happening. Then scan again looking specifically for motorcycles. If everything looks good, safely make your left turn.
5. Allow adequate following distance. When it comes to slowing down, motorcyclists may not use their brakes immediately, so don’t expect to see brake lights. Motorcyclists may reduce speed by relaxing the throttle or downshifting so the speed will drop without ever touching their brakes.
6. Focus. Focus on driving and paying attention to what’s going on outside your vehicle. Eliminate distractions inside your vehicle.
If you’re a new rider or thinking about starting to ride, here are some tips for you.
1. Enroll in a class. Once you made the decision to ride, consider enrolling in a class. Basic rider classes, such as the one offered at Road America, teach basic riding skills in a safe controlled environment. They even provide the motorcycles! This is a great way to find out if riding is for you before making the purchase. The other benefit is that after you complete the course, you earn a motorcycle license. There’s no need to take a road test with your local Department of Motor Vehicles (DMV). To find a class near you, visit the Motorcycle Safety Foundation.
2. Practice, Practice, Practice. After completing the basic rider’s class, continue to practice. Riding in a quiet neighborhood allows you to continue to learn how the motorcycle handles without heavy traffic. The more you ride, the more comfortable you’ll be. In addition, riding in a quiet neighborhood during different weather conditions will help you learn additional driving skills.
3. Remain alert. When driving a motorcycle, extra attention is needed. Constantly scan the environment for changing conditions. Pay attention to what the cars around you are doing, and watch for pedestrians and darting animals.
4. Avoid drowsy driving. Never drive a motorcycle if you’re tired or under the influence of drugs or alcohol. All these things can slow down your reaction time and cause a crash.
5. Make sure you’re seen. Because of the size and speed of motorcycles, your visibility may be limited to other motorists around you. Wear bright clothing and put reflective material on your motorcycle or clothing. Also, position yourself in your lane so you’re more visible to other motorists.
Do you have any tips or information you’d like to share? I’d love to hear them; please share them in the box below.
Source:
https://www.msf-usa.org/
by Flagship Staff | Jun 19, 2017 | Blog
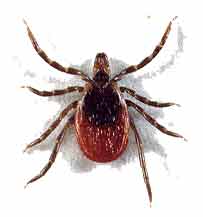
It’s been reported in the news that the 2017 tick season is going to be worse than usual. If you’re wondering why they’re anticipating such a bad season, there’s some supporting evidence.
This year, our Midwest winter was on the mild side. While this led to less shoveling and warmer temperatures, it also allowed ticks to thrive and emerge earlier than they typically do. Mice are often hosts for ticks and because there’s a shortage, ticks are looking for other species to prey on … humans and pets!
Regions that will be most affected this year are the Northeast, mid-Atlantic, and the upper Midwest.
According to the Centers for Disease Control and Prevention (CDC), a bite by an infected tick causes approximately 300,000 infections each year.
If you plan to enjoy camping and other outdoor activities this summer, you should know:
Where they live;
How to protect yourself and your pets;
How to perform daily checks; and
Symptoms of Lyme disease.
Where they live?
Ticks live in wooded or grassy areas.
How to protect yourself and your pets
Avoid wooded or grassy areas. Walk in the center of trails.
Buy an appropriate repellant. The Centers for Disease Control and Prevention recommends using repellents that contains 20% or more DEET. If you use a repellant with DEET, please follow product directions carefully, especially when applying it on children. To find a repellent appropriate for you and your family, visit the United States Environmental Protection Agency website.
Wear proper clothing. If venturing into the woods, wear long pants, shirts, and closed toe shoes. Also, consider treating your clothing and other gear with 0.5% permethrin.
Keep an eye on your pets. Avoid letting them run freely if you’re camping in a woods or near tall grasses. While this may not be as fun for them, it can help prevent tick bites. In addition, talk to your veterinarian about using tick collars and other possible treatments.
Conduct inspections. Before entering your home, cabin, or camper, look at your clothing to make sure you don’t see any creepy crawlies. Also, inspect your pets.
Take a shower or bath. Wash your body soon after you come inside to remove ticks that may be crawling on your skin.
Wash your clothing appropriately. Wash your clothes immediately after coming in from outside using hot water to kill the ticks. If hot water isn’t an option, wash them in a colder temperature, and then dry them for approximately 60 minutes using high heat. If you can’t wash your clothes at all, put them in the dryer on high heat for 10 minutes.
How to perform daily checks
Examine your body daily. Ticks like warm areas of the body.
Check for ticks:
Under your arms;
Behind your knees;
In your hair and around your ears;
Inside your belly button; and
Between your legs.
Symptoms of Lyme disease
While not everyone experiences the same symptoms, here are some early signs of the disease.
A red circular rash that extends out from the site of the bite;
Facial palsy;
Pain in muscles, joints, and tendons;
Heart palpitations and dizziness; and
Flu-like symptoms that may include headache, fever, and overall body soreness.
If left untreated after several months, the disease will progress and the symptoms may get worse.
If you think you’ve been bitten by a tick or have Lyme disease, please seek medical attention immediately. Untreated Lyme disease can be deadly.
For more information, visit the CDC’s website.
Sources:
http://www.pestworld.org/news-hub/pest-articles/the-year-of-the-tick/
https://www.cdc.gov/features/lymedisease/index.html

by Flagship Staff | Jun 12, 2017 | Blog
Losing a home to a fire or tornado is a devastating life-changing event. If your home were destroyed, would you have enough coverage on your homeowner’s policy? Many policies provide a specific percentage of coverage based on the value of your home’s contents (clothes, TVs, appliances, etc.), other structures (garages and sheds), and additional living expenses (expenses like rent you must temporarily pay because your home isn’t livable). It’s hard to know what coverage amount is right for you.
Most of us acquire our clothes, furniture, sports equipment, and other personal items over a long period of time. They’re often received as gifts or purchased at sale prices. Unfortunately, after a home loss, there’s not much time to shop for sales because you need to replace these items as soon as you can. When that happens, people typically discover their contents cost more than they thought.
Fortunately, Flagship Insurance can relieve the worry associated with not having enough coverage. How? With blanket coverage for other structures, contents, and additional living expense. Insurance companies suggest using 2.5 times the home’s replacement value (or coverage A on your homeowner’s policy) to determine that amount. The minimum is $300,000. This means that if your home has a replacement value of $250,000, your blanket limit would be $625,000.
Rather than specifying dollar amounts for each area of coverage (home, contents, other structures, and living expenses), that amount is used as a blanket to cover all four of those areas. This allows us to place coverage where it’s needed at the time of loss. For instance, let’s say there are no other structures on the premises. Money that would have been used to rebuild the structure(s) can be used for contents or additional living expenses to help get you back to where you were before the tragedy.
To make sure you have the right coverage, talk to your independent insurance agent.

by Flagship Staff | Jun 5, 2017 | Blog
Nothing puts you on edge like a big storm. Whether it’s pounding rain and crashing thunder or a blizzard that knocks out the power for days, nasty weather can have you questioning your family’s fundamental security—and the steadfastness of the home that keeps you safe.
In fact, a really bad squall challenges all the things you usually take for granted: you have visions of your home being swept away, Wizard-of-Oz-style, on a gust of wind, with all your possessions—not to mention a major investment—airborne in one fell swoop.
Of course, it’s probably not going to happen like that. Most storm damage is a bit less dramatic, though no less anxiety-provoking. Leaks, ice dams, and fallen tree branches all present hazards that can make you and your family more susceptible to bad weather—and cost thousands of dollars to repair. Not all storm damage is avoidable, of course, but you can shore up a lot of vulnerabilities just by keeping a close watch over your roof maintenance.
Give Your Gutters a Good Flush
Your home’s gutters actually serve a purpose, and believe it or not, that function is not just to add to your home maintenance checklist. Your drainage system carries water and debris away from your roof and back onto the ground, where it belongs. But when your gutters are clogged, water backs up onto your roof and siding. This speeds up leaks and puts you at risk of more subtle problems, such as mold and roof rot. To keep your home in the clear, make sure to get up on the ladder at least twice a year—once in the fall, and once in the spring.
Put the Damper on Ice Dams
Icicles may look quaint hanging from the eaves of a gingerbread home, but in real life, they’re dangerous predictors of trouble to come. Icicles are usually a sign that your home has an ice dam—a buildup of ice layers from snow melting and refreezing when it hits the colder outer edges of your roof. Why’s that so bad? Ice is a lot heavier than snow—a one-inch layer of ice weighs about five pounds per square foot. Multiply that 20 or 30 times and you’ve got a real problem on your hands. Ice dams often block drainage systems and prevent runoff that could help lighten the load. And since roofs aren’t made to withstand standing water and ice, the dams can cause them to buckle, degrade, and leak over time. Ice formations are usually a sign that you have inadequate insulation or poor ventilation in your home. A roofing inspector can spot both problems—and solving these issues means you’ll use less energy to heat your home, too! Win-win!
Don’t Take Your Time Fixing Missing Shingles
I don’t need to tell you that missing shingles are a problem. If you’re a homeowner, you probably already know that a broken or absent shingle will set you up for leaks. But unless you have water dripping onto your kitchen table, it’s one of those issues that’s easy to ignore. However, you may not be as leak-free as you think. Water infiltration can occur in attics or inside walls—places where you may not see it until you have a full-blown mold infestation on your hands. Do yourself a favor and hammer out replacement shingles sooner, rather than later. It could save you a lot of trouble next time it rains.
Undergo Regular Roofing Inspections
Speaking of missing shingles, did you know you should have your roof inspected every three to five years? Unless you’re fond of ladders, you probably don’t get up on your roof all that often. And that can make it hard to see issues that aren’t visible from the ground. But a qualified inspector can seek out tiny, nearly-invisible problems—like pinhole leaks—which can cost you a lot if they’re not caught early on. Some roofing contractors even offer inspection services for free, so there’s no financial incentive to skip them—especially when a small repair now can save you the cost of a new roofing installation in a year or two.
Trim Back Nearby Branches
The old oak tree in the yard: a symbol of your deep familial roots and community connections. But when the winds blow, the branches may break, and when the bough breaks, your roof’s integrity is not far behind. Branches carried at high wind speeds can slam into your roof, causing damages untold. Protect your roof by hiring an arborist—a good tree guy will trim overhanging branches and inspect for rotting tree trunks that could be knocked over by one bad blow. A little preparation may not reel in every little fear, but you’ll definitely rest easier the next time it storms. Bring on the rain!
by Flagship Staff | May 29, 2017 | Blog
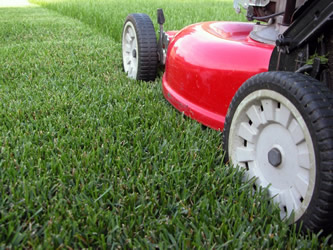
While operating a lawn mower is a common task this time of year, it can be dangerous. Flying debris, moving and hot parts, and errors in judgment can quickly lead to serious injury.
According to the Consumer Product Safety Commission, 80,000 people make an unexpected trip to the emergency room each year because of lawn mower injuries. Here are some tips to keep you and your family safe this lawn-mowing season.
1. Inspect your lawn. Before cutting your lawn, take a quick walk around your property. Look for debris that could cause injury if it shot out of your lawn mower, including
Stones
Sticks
Mulch
Children’s toys
If you live in a neighborhood with lots of dog walkers, you may also want to make sure there are no unwanted surprises.
2. Pay attention to your surroundings. If your neighborhood is active, pay attention to what’s going on around you. Be on the lookout for walkers/runners, strollers, and small children riding their bikes. If they come into close proximity to you, stop mowing and shut off your lawn mower. This will prevent debris from shooting out in their direction and allow parents to be heard if they’re giving their children commands like, “Stop at the corner” or “Watch for cars.”
3. Train your yard crew. If you have kids, they may be eager to help you cut the lawn. If they’re like my 13-year-old, an opportunity to earn money may be the motivator. If you let them help, it’s recommended that kids be at least 12 years old to operate a push mower. If you have a riding mower, the recommended age is 16.
You would never just turn over the keys of your car to a new driver, and the same holds true with the lawn mower. Explain to them how the lawn mower works, emphasizing safety and different scenarios they may encounter. Cut a couple of rows so they can see how it’s done. When it’s their turn, walk with them and provide instruction. Once you feel confident, let them try it on their own. I would, however, recommend that you stay close and watch the first few times.
4. Enforce a no play zone. When cutting the lawn, it’s important to keep your children out of harm’s way. Let them know that when you’re cutting, they’re not allowed near you. Tell them where they can play or what they can do to pass the time until you’re finished. In addition, it’s always a good idea to leave your pets inside.
5. Avoid giving rides. While it may seem harmless to give your kids or others a ride, it’s best to avoid this. In the blink of an eye, slips and falls can lead to serious, or even deadly, accidents.
6. Go with the flow. If you have steep slopes in your yard, make sure you drive up and down and not side to side. While the crossing patterns may be more visually appealing, you’ll prevent mower rollover if you avoid this.
7. Protect your eyes. It’s always important to wear glasses or goggles when working in your yard, especially if you’re cutting around trees with low hanging branches.
8. Wear appropriate shoes. This seems like a no brainer, but being a flip-flop guy, I know it’s tempting to wear them. Instead, wear shoes or boots with good traction and stability. Uneven ground or slippery areas can lead to injuries.
9. Protect your ears. Wear earplugs or safety earmuffs when using your lawn mower, trimmer, or blower. According to Consumer Reports, we should try to avoid extended exposure to sound that’s 75 to 85 decibels or more. Above that, hearing protection should be worn. Lawn mowers, sporting events, concerts, and movie theaters can produce sounds well over 100 decibels. Hearing protection is easy to get and affordable. I recently bought a 30-count box of foam earplugs for less than $10.
10. Always inspect with the motor off. A sudden clog caused by a clump of grass or other yard debris may tempt you to lift up the lawn mower to clear it. Always shut down the mower before conducting a physical inspection.
11. Cool down time. After a hard day’s work, give your lawn mower time to cool down before storing it. A lawn mower’s muffler can reach 240 degrees Fahrenheit and can cause a fire if it’s stored next to flammable objects.
Do you have any tips or information you’d like to share? I’d love to hear them; please share them in the box below.
